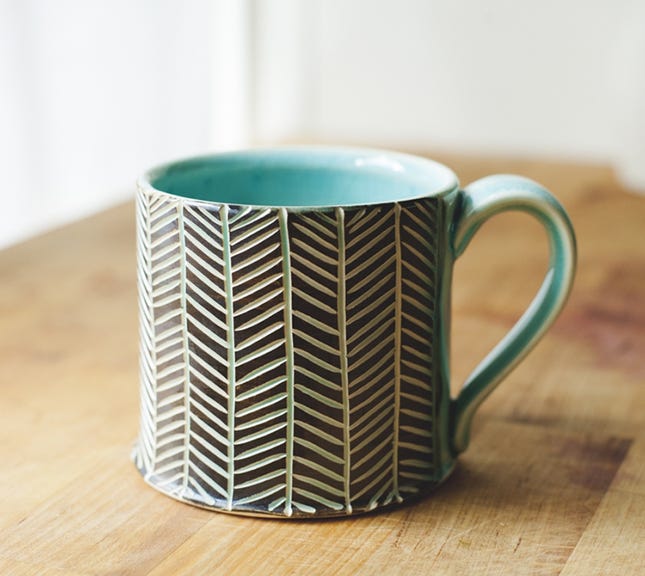
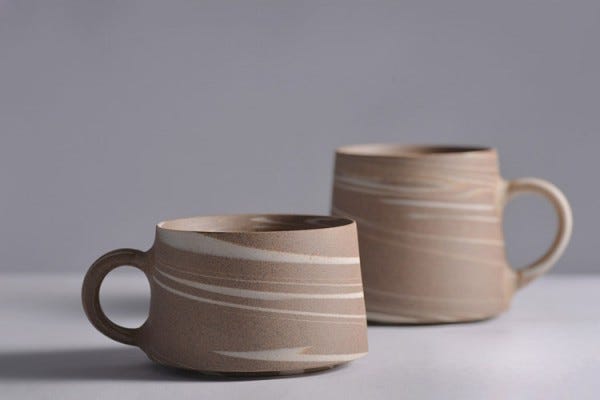
Throwing a ceramic mug in twelve easy steps

Step one: choosing your clay
Before you start, you have to choose your clay. Stand in the supply room and take in your options — some smooth and light, some gritty and dark, some sandy and red. Whereas most dish ware is typically porcelain, you leave that for the masters. Porcelain has a way of collapsing in your hands.
Step two: measuring your clay
Measure out the amount of clay you want to use. Better potters would use less clay for a lighter final product, but you give yourself some wiggle room — two pounds will let you throw something sturdier and easier to shape.
Step three: wedging
Your college ceramics professor taught you the ram’s head pattern and so this is what you use, even though everyone else at this studio uses the conch shell pattern. You don’t know how to do the conch shell and every time you try you end up doing the ram’s head somehow anyway. Spend at least a minute using this ungulatory technique, inferior as it is in the eyes of everyone around you, to knead all of the air bubbles out of your clay, lest it explode in the kiln.
Step four: attaching your clay to the wheel
With your clay prepared in a round ball and your station readied with sponge, water bucket, needle tool, wire cutter, and other miscellaneous tools, it’s time to attach your clay to the wheel. Dab a few drops of water to the center to help it stick, then grasp the ball of clay and slap it firmly to the center. Or close to the center, because you can never quite do this right. You can never quite do anything right, really. Try not to think about your ex, Darren.
Step five: centering
Wet your hands. Lock your left elbow into the crook of your hip and press the heel of your palm up against the clay, pulling it towards you with your right hand. Darren had amazing hands. Calloused, with good fingernails. Your hand has a scab on it from when you accidentally walked into a wall at work yesterday.
Continue to pull with your right hand, keeping your left hand steady, until the clay begins to cone upward. Follow the clay as it rises until finally your hands meet.
Wet your hands again; do this regularly.
Now gently place your right hand on top of your cone. Keep your left hand steady, bracing and evening the clay as you channel the weight of your torso through your right hand and press firmly down. Flatten the clay back towards the wheel until the diameter of the mass widens to roughly mug-sized. You learned how to do this from a YouTube video. Wonder how that YouTube guy is doing — he was Australian. You’ve only met three Australians in your whole life.
Step six: drilling the hole
Of those three Australians, you slept with only one. His name was Brent, he was seven years older than you, and you met at a networking event sponsored by Fitbit last October. You never saw him again — are you a slut? Your friend Amanda called you a slut in college once, but she was a bitch, in retrospect.
Take a moment to lightly rest your hands on your piece while it’s spinning to check for unevenness; it should feel smooth under your palm, almost as though it weren’t spinning at all.
To be fair to Amanda, you had a lot of sex in college. You know now that you were trying to fill a hole that couldn’t be filled.
Once you’ve effectively centered your clay, you can slowly press your index finger down into the center of it, stopping a bit shy of the bottom to leave room for the foot. Check how much clay you have remaining by using your needle tool to poke through to the bottom and measure the difference. Make the hole a bit deeper if necessary.
Step seven: widening the floor
When you’ve reached a satisfactory depth, it’s time to widen the hole, creating the floor of your mug. Place the index finger of your right hand inside, gently bracing the outside wall of your clay with your left hand, and slowly pull in towards yourself, widening the hole as you do. Move slowly, staying focused on this hole and not the one you so very childishly sighed over in step six, when you briefly fancied yourself poetic, forgetting that you are in fact boring, unremarkable, and depressing.
Continue to open up the clay until the floor reaches your desired diameter.
Step eight: compressing the floor
An important and oft-forgotten step in making any sort of clay vessel is to compress the floor; this helps reduce the risks of cracks in the kiln. Take your sponge in your right hand and gently press it down into the center of the floor, slowly moving the sponge towards yourself until you reach the inside of the wall. Replace the sponge with your wooden rib and repeat with the same motion, angling the edge of the rib slightly towards the center of your mug to create a gentle slope at the corners.
Step nine: raising the walls
It took half of your college ceramics course to learn how to properly raise walls, and even now you’re not guaranteed to get it right. Cracking it required sneaking into the studio on a Friday night — not really sneaking, actually, since your student ID card unlocked the door, but there the lights were off, and there was no one else there, and it felt clandestine, doing something like this on a Friday, while Darren and the boys worked their way through 40s on some dilapidated porch somewhere, their eyes glittering with the reflections of lighters and glowing ashes all while you threw cylinder after cylinder, four inches tall , four and a half, twisting and collapsing sacrificial lump after lump, until you finally made it to six. As it turned out, you could only truly do it when you weren’t looking.
So now, cast your eyes out across the hot and dusty studio, sightless, channeling all of your ability to sense into the tips of your fingers as you start at the base, pinch the weight of the clay, and feel it settle trustingly above two sets of fingers, index and middle pressed flat against either side of the stocky little wall. Lift slowly, nineteen again, wondering if Darren has left for the party at SAE yet, whether he’ll wait for you in your splattered denim, whether the clay will snag and tear between your fingers, blooming open in a ragged flower.
After each pull, be sure to re-compress the floor and smooth the rim.
Step ten: adding character
Straight walls are nice and all, but a true artist won’t settle for “nice.” You are not a true artist. This is fine.
Step eleven: cleaning the base
You’ve finished shaping your vessel; you need to remove it from the wheel and let it dry before you can proceed. Which means first, you need to clean up the base, ridding yourself of any remaining weight which, through your amateur pulls, you were unable to coax higher.
Take your wooden tool — not the rib, the other one, the one you can never remember the name of — and turn its point on the base of your wall, slowly pressing in at a roughly 45-degree angle until you hit the wheel. Use the same tool to delicately scrape the excess clay away — do not impale your progeny, hideous as it may be — and toss the scraps into your water bucket, feeling irrationally sad for them, destined for the slop bins in the corner, never fired, never glazed, never holding food or water or touching the hands or lips of a human being. Furrow your brow, embarrassed at your ridiculous projection of emotion on inanimate mud, and tell yourself that it’s fine, that it means you’re compassionate, gentle, good — worthy of something, though you don’t know what. The universe doesn’t either, has yet to deliver you anything remarkable, probably never will, came its closest in a pair of straight and sturdy hands attached to nothing worth holding onto.
Step twelve: removing from the wheel
Your piece is ready to remove from the wheel. Stand up, stretch, shuffle across the room and find a piece of plywood on the shelf next to the sink: something small, so as not to rob those who dream bigger of the opportunity to fit their whole piece on a single slab.
Return to your wheel. Turn off the power — you don’t want to accidentally start spinning halfway through. Remove the plastic splash-guard. Try not to spill the muddy silt that sloshes dangerously at the bottom of each half. Set them gingerly on the floor.
Soak your sponge in water, then wring it out over the wheel. Repeat several times; you want your piece to hydroplane.
Locate your wire cutter. Slice your finger on it slightly, as you always do. Don’t think about how scarred your hands already are, how wrinkled your face is. Don’t think about how white the hairs were that you pulled, horrified, from your scalp last week. Don’t think about the fact that it’s probably the job, the nine-to-five that’s really eight-to-six, the hour long commutes where you sit motionless, blank-faced, methodically pressing and unpressing the brake as your ear-drums slowly unravel in the face of music that can never be loud enough to awaken a goddamn thing in you. Don’t think about the fact that you can’t blame shit on your job or the so-called “man,” that it’s you who chose this; that it’s you who dropped absolutely everything to chase down something you called “Opportunity,” who now sits on that cheap-ass IKEA couch eating microwave meals at 10pm on Tuesdays; who now spends an hour sitting on transit each way to go get fucked every other weekend by a 42-year-old lawyer named Matt who has yet to ever even go down on you and who will certainly never want to date you, you who stays in bed until noon on weekends despite trembling awake at 8am, soaking in sweat and struggling to remember dreams about park benches, tar-filled pits, neat and even fingernails —
Run the wire beneath the base of your clay, repeating until it begins to slide across the water.
Don’t think about the time the two of you drove up and down the Wynoochee river trying to find a legal camping spot, splitting a bag of 2-for-two-dollars 7-Eleven jellybeans, fighting over who would get the pink ones, eventually settling on just breaking the law, setting up his little orange tent on a bed of dried and cracking mud beside the river — where you made mac-and-cheese tacos for dinner on his cheap little red stove, laughing and gagging in equal measure at the predictably hideous outcome — where you turned in early, slipping bare-skinned into a single sleeping bag, hearts beating fast, smooth unblemished limbs trembling, intertwined.
Place your index and middle fingers around the base in the shape of a diamond. Lift gently and transfer your piece slowly to the board. Wrap your piece loosely in plastic and set it on a drying shelf.
You will continue by trimming the foot and attaching the handle later this week, before bisque firing, glazing, and finally glaze firing. In a month’s time, you might just have a beautiful mug. But there are many ways the process can go wrong — perhaps you’ll have nothing at all.
So you cross your crooked fingers, measure out more clay, and carry on.
Originally published at www.truescotsman.fyi.
